


Resize Logos in Digitization for Embroidery 2025
Learn how to resize logos without losing quality in digitization for embroidery in 2025. Discover best practices for clear, precise designs.
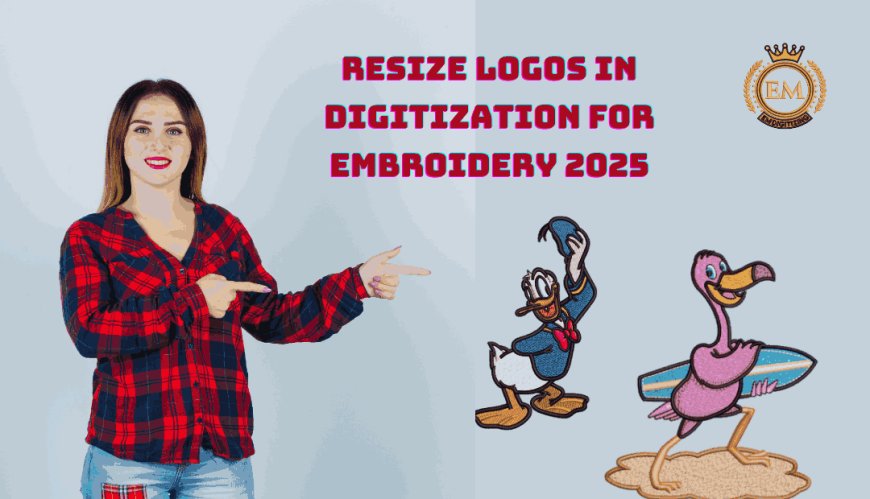
Digitization for embroidery transforms artwork into stitch files, and resizing logos without losing quality is a critical skill for achieving professional results. In 2025, businesses and designers often need to adjust logo sizes for various applications, from small patches to large jacket backs, while maintaining clarity and durability. This blog explores how to resize logos without losing quality in digitization for embroidery, covering techniques, challenges, and best practices for flawless outcomes.
By mastering resizing techniques, digitizers ensure logos remain sharp and vibrant across different sizes and fabrics. The best embroidery digitizing practices focus on precision and fabric compatibility to maintain quality during resizing. Lets dive into the key strategies for resizing logos effectively in 2025.
Why Resizing Logos Matters in Embroidery Digitizing
Resizing logos for embroidery requires careful adjustments to maintain design integrity. Scaling a logo up or down without proper digitization can lead to distorted details, uneven stitches, or inappropriate density, compromising the final product. Accurate resizing ensures logos look professional on items like hats, shirts, or bags, regardless of size.
In 2025, digitization for embroidery must address resizing challenges to meet diverse project needs. Proper techniques preserve design clarity, ensuring logos align with branding and aesthetic goals across various applications.
Key Factors for Resizing Logos Without Quality Loss
To resize logos effectively, focus on:
-
Artwork Quality: Using scalable files to preserve details.
-
Stitch Adjustments: Modifying stitch types for size changes.
-
Density Optimization: Balancing stitch count for clarity.
-
Testing and Validation: Ensuring resized designs perform well.
These factors ensure logos remain clear and durable, aligning with 2025s quality standards.
Benefits of Proper Logo Resizing
Effective resizing offers:
-
Design Clarity: Maintains sharp details at any size.
-
Fabric Compatibility: Ensures stitches suit material properties.
-
Versatility: Adapts logos for various applications.
-
Professional Results: Enhances branding and visual appeal.
These benefits highlight the importance of resizing in digitizing.
Step 1: Start with High-Quality Artwork
High-quality artwork is essential for resizing logos without quality loss. Vector files (.SVG, .AI) are ideal due to their scalability, preserving details like text or intricate patterns when scaled up or down. High-resolution bitmaps (300 DPI) can work but may require simplification to avoid stitch overcrowding in smaller sizes.
Using scalable artwork minimizes distortion and reduces manual adjustments during digitization. This step is critical for maintaining quality in the embroidery digitizing process, ensuring precise logos in 2025.
Artwork Preparation Strategies
To ensure quality artwork, use:
-
Vector Files: Provide .SVG or .AI for scalable resizing.
-
Simplify Small Designs: Reduce details for tiny logos.
-
Check Resolution: Use 300 DPI for non-vector artwork.
-
Preview Scaling: Visualize logo at target sizes digitally.
Clear artwork ensures resizing accuracy.
Step 2: Adjust Stitch Types for Size Changes
Stitch types must be adapted when resizing logos to maintain clarity. For smaller logos (e.g., 1-2 inches), satin stitches (2-4mm) ensure legible outlines, while larger logos (e.g., 6-10 inches) may use fill stitches for even coverage. Running stitches add fine details but may be omitted in tiny designs to avoid clutter.
Digitizers test stitch selections on sample fabrics to confirm clarity at different sizes. Adjusting stitches for size aligns with the best embroidery digitizing practices, ensuring quality logos in 2025.
Stitch Adjustment Techniques
To optimize stitches, use:
-
Satin for Small Logos: Ensures clear outlines in tiny designs.
-
Fill for Large Logos: Provides uniform coverage for bigger areas.
-
Omit Fine Details: Remove running stitches for small sizes.
-
Sample Testing: Verifies stitch performance at target sizes.
Tailored stitches maintain logo clarity.
Step 3: Optimize Density for Resized Logos
Stitch density must be adjusted when resizing to balance clarity and fabric stability. Smaller logos require lower density (e.g., 0.5mm spacing) to prevent overcrowding, while larger logos need higher density (e.g., 0.4mm) for full coverage. Underlay stitches, like zigzag for small designs or grid for larger ones, stabilize fabrics during resizing.
Digitizers use virtual tools to test density settings, ensuring no puckering or gaps. Proper density optimization is crucial for high-quality logo resizing in embroidery digitizing for 2025.
Density Optimization Strategies
To optimize density, use:
-
Lower Density for Small: Prevents overcrowding in tiny logos.
-
Higher Density for Large: Ensures full coverage in bigger designs.
-
Underlay Adjustments: Matches underlay to logo size.
-
Virtual Testing: Simulates density performance digitally.
Custom density ensures resized logo quality.
Step 4: Plan Stitch Paths for Size Compatibility
Stitch paths affect alignment and fabric tension when resizing logos. For smaller logos, digitizers plan compact paths with minimal trims to maintain detail clarity. Larger logos require broader paths, starting from the center and moving outward to distribute tension evenly, reducing fabric stress.
Efficient path planning ensures stitches align with the resized design, preserving quality. This step enhances design accuracy in embroidery digitizing, supporting flawless logos in 2025.
Path Planning Techniques
To plan paths, use:
-
Compact Paths for Small: Minimizes trims for tiny logos.
-
Broad Paths for Large: Distributes tension for bigger designs.
-
Grain Alignment: Ensures stability across sizes.
-
Path Simulations: Previews stitch flow for accuracy.
Optimized paths maintain logo precision.
Step 5: Test Resized Logos for Quality
Testing ensures resized logos perform well on target fabrics. Digitizers stitch samples using identical threads and stabilizers, inspecting for clarity, alignment, and durability at the new size. Virtual testing tools simulate outcomes, allowing quick adjustments to stitches, density, or paths before physical samples.
Rigorous testing prevents errors like distortion or thread breaks, ensuring professional results. This step is essential for high-quality embroidery digitizing, delivering resized logos in 2025.
Testing Best Practices
To validate resized logos, use:
-
Match Target Fabrics: Test with identical materials and threads.
-
Inspect Detail Clarity: Ensure logos remain sharp at new sizes.
-
Verify Durability: Confirm stitches withstand wear.
-
Virtual Simulations: Preview performance digitally.
Testing ensures resized logo quality.
Fabric-Specific Resizing Considerations
Different fabrics require tailored resizing approaches:
-
Cotton/Twill: Moderate density for clear, scalable logos.
-
Knits/Polyester: Low density and cut-away stabilizers for flexibility.
-
Silk/Chiffon: Minimal stitches to preserve delicate details.
-
Denim/Fleece: High density and grid underlay for robust logos.
Digitizers adjust settings for fabric compatibility, ensuring resized logos maintain quality. Fabric-specific resizing is critical for professional embroidery in 2025.
Fabric-Specific Strategies
To resize for fabrics, use:
-
Cotton Settings: Moderate density for scalable clarity.
-
Knit Stabilizers: Cut-away for stretchy fabric logos.
-
Silk Precautions: Light stitches for delicate resizing.
-
Denim Reinforcement: Heavy underlay for large logos.
Fabric adjustments optimize resized logos.
Specialty Techniques and Logo Resizing
Specialty techniques require resizing adjustments:
-
3D Puff: Dense satin stitches for bold, scalable effects.
-
Appliqu: Adjusted layering for resized textured designs.
-
Metallic Threads: Low density for shiny, clear logos.
Digitizers tailor these techniques to maintain quality at different sizes. Specialty resizing enhances creative logos in 2025 embroidery projects.
Specialty Resizing Strategies
To resize specialty techniques, use:
-
Puff Density Scaling: Adjusts for bold effects at any size.
-
Appliqu Simplification: Reduces stitches for smaller logos.
-
Metallic Adjustments: Lowers density for resized shine.
-
Sample Testing: Verifies specialty logo quality.
Specialty resizing maintains creative accuracy.
Challenges in Resizing Logos for Embroidery
Resizing challenges include:
-
Challenge: Detail Loss in Small Logos
Solution: Simplify artwork and use low-density satin stitches. -
Challenge: Distortion in Large Logos
Solution: Increase density and use grid underlay. -
Challenge: Thread Breaks
Solution: Optimize stitch paths and test thoroughly. -
Challenge: Fabric Incompatibility
Solution: Adjust settings for material properties.
These solutions ensure quality resized logos in 2025.
Technologys Role in Resizing Logos
Technology aids resizing through:
-
Vector Editing Tools: Scale artwork without quality loss.
-
3D Previews: Visualize resized logos on virtual fabrics.
-
Auto-Density Tools: Adjust stitch count for size changes.
-
Virtual Testing Software: Detects errors before production.
These tools enhance precision, aligning with best embroidery digitizing practices. Technology drives quality logo resizing in 2025.
Technology Utilization Strategies
To leverage technology, use:
-
Vector Scaling Tools: Resize artwork accurately.
-
3D Previews: Verify logo clarity at new sizes.
-
Auto-Density Adjustments: Optimize stitches for size.
-
Virtual Testing: Simulate resized logo performance.
Technology ensures precise logo resizing.
Collaborating for Quality Logo Resizing
Clients support resizing by providing scalable artwork and project details, such as target size and fabric type. Digitizers request vector files and share digital previews for feedback, ensuring resized logos meet expectations. Prompt client input reduces revisions, maintaining quality and speed.
Effective collaboration leverages digitization expertise, ensuring resized logos are accurate. Clear communication is critical for successful embroidery outcomes in 2025.
Collaboration Best Practices
To collaborate effectively, use:
-
Submit Vector Artwork: Provide .SVG or .AI for scalability.
-
Specify Size and Fabric: Note target dimensions and materials.
-
Review Previews Promptly: Approve resized designs for accuracy.
-
Test Samples Quickly: Confirm quality before production.
Collaboration ensures quality resized logos.
Applications of Resized Logo Digitization
Resized logo digitization supports:
-
Corporate Branding: Scalable logos for uniforms or caps.
-
Sportswear: Adjusted designs for jerseys or hats.
-
Fashion Apparel: Resized patterns for trendy garments.
-
Promotional Items: Custom logos for giveaways.
These applications highlight resizings role in 2025.
Tips for Clients to Resize Logos Effectively
Clients can optimize resizing with:
-
Provide Scalable Artwork: Use vector files for clear resizing.
-
Specify Target Sizes: Note dimensions for each application.
-
Clarify Fabric Needs: Define materials for tailored settings.
-
Review Previews Carefully: Ensure accuracy at new sizes.
-
Test Samples Early: Verify quality for production.
These strategies enhance resized logo outcomes.
Conclusion
Resizing logos without losing quality in digitization for embroidery requires high-quality artwork, optimized stitch types, adjusted density, efficient path planning, and rigorous testing. By addressing challenges like detail loss and fabric incompatibility, and leveraging technology for precision, digitizers ensure clear, durable logos across sizes in 2025. The best embroidery digitizing practices emphasize fabric-specific adjustments and collaboration to achieve flawless results. Partner with a skilled digitizing service to resize your logos with precision and quality for any embroidery project.
FAQs
Q: Why is resizing logos important in digitization for embroidery?
Resizing ensures logos remain clear and durable across sizes, meeting project needs.
Q: How does artwork quality affect logo resizing?
Scalable vector files preserve details, ensuring clarity when resizing logos.
Q: How does fabric type impact logo resizing?
Fabrics like knits or denim require tailored density for resized logo quality.
Q: What role does testing play in resizing logos?
Testing verifies clarity and durability, preventing errors in resized logos.
Q: How can clients support quality logo resizing?
Provide vector artwork, specify sizes, review previews, and test samples promptly.